Content Disclaimer

I've collected several photos through the image search feature on Google. If any of the featured images are yours, please contact me so I can add a credit if I haven't done so already. I will also gladly remove an image upon request. And please return the favor of crediting: if you use one of my photos, please link back to me! Thanks for all the inspiration!
Showing posts with label bouquet. Show all posts

Friday, October 1, 2010

Southern Sweethearts: All the Small Things

"As a journalist, the details always tell the story. "
James McBride

Oh, how I completely understand this quote! (I am a journalist, photographer, and self-proclaimed perfectionist. So details are kinda my thing.) And that's why I had details galore in our wedding! Many of them were DIY details that I'm sure some of you have been waiting a looong time to see in action.

They'll be plenty more details in coming posts, but here's some to get you ready for the main event: our ceremony! :)

First, my lovely DIY flowers!

Photobucket

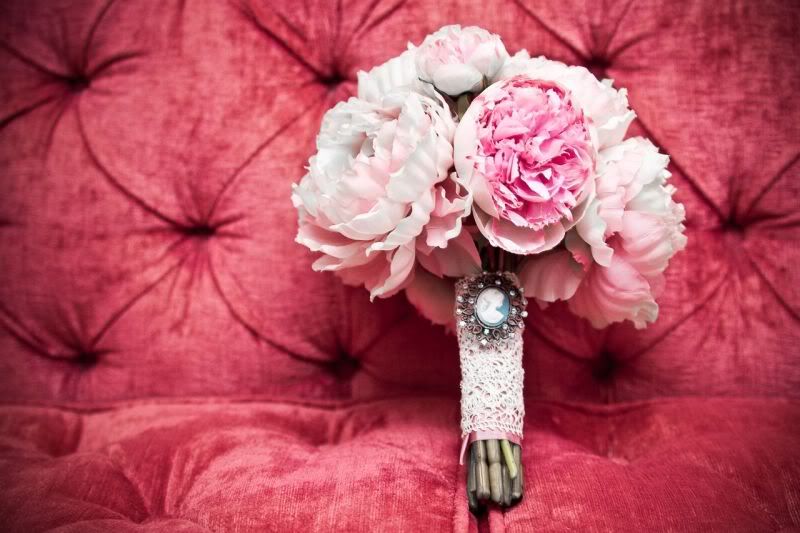
At first, I wanted an all white peony bouquet. But when our colors changed, I decided on a pink bouquet and I absolutely loved the way my bouquet came out!

Photobucket

My something blue!

Photobucket

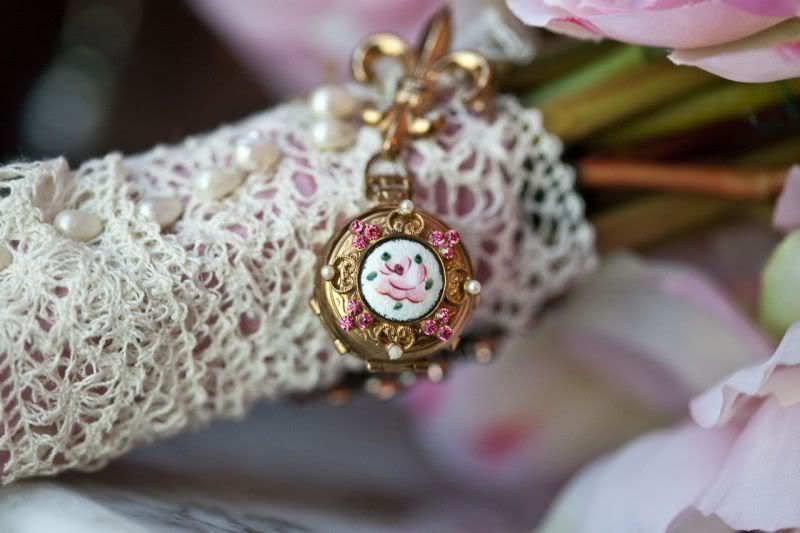
Unfortunately, I didn't have time to gather family photos for my special locket. My Mom had recently moved and all of her stuff was in storage, making it extremely difficult to get to the photos in time. :(

Photobucket

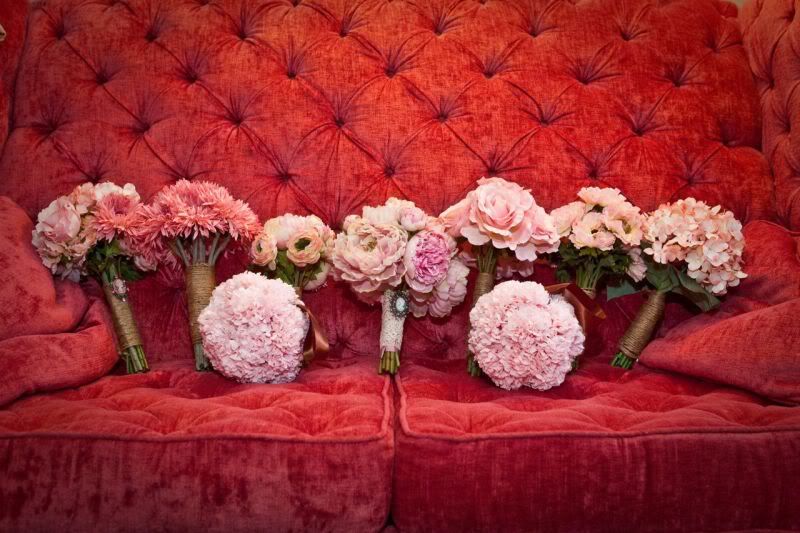
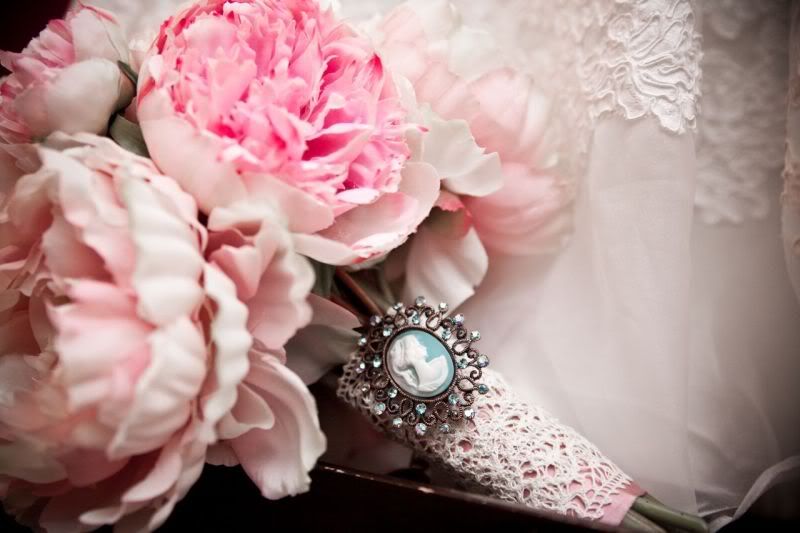
I loved ALL of my bouquets (bridesmaids, flower girls, mothers, and toss)...

Photobucket

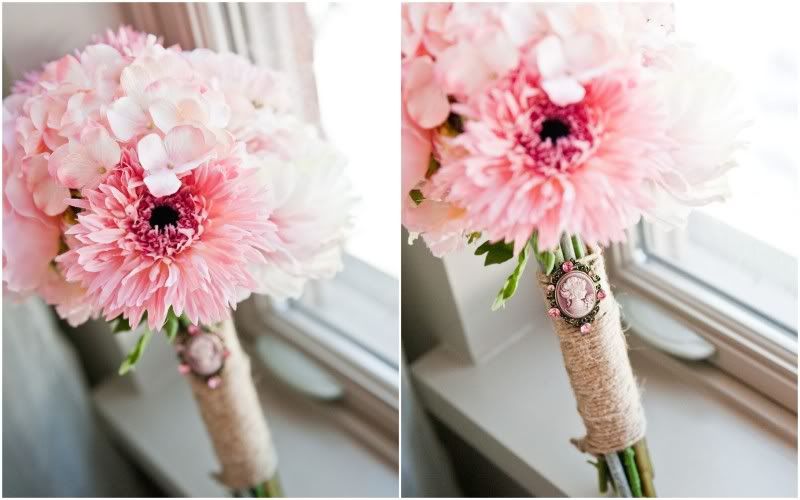
...but I put a little more effort into the matron of honor bouquet. Hers was a mix of all the flowers used, and it had its own cameo to distinguish it from the others.
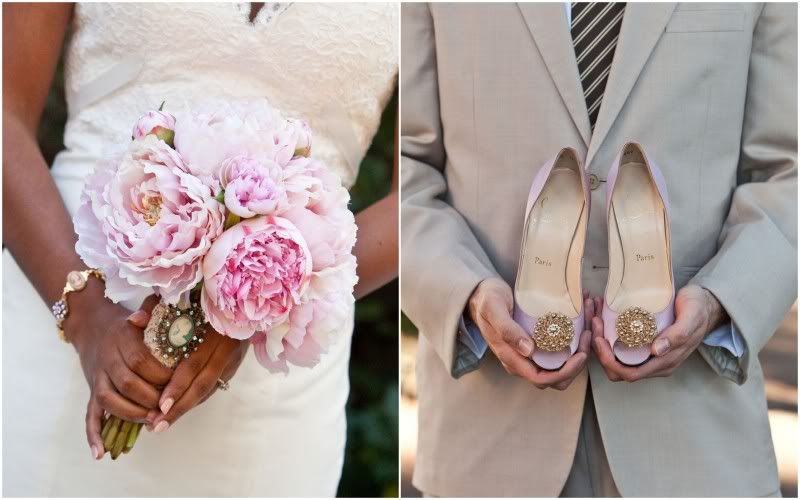
Photobucket

Do I spy Loubies?

Photobucket

Why yes I do!

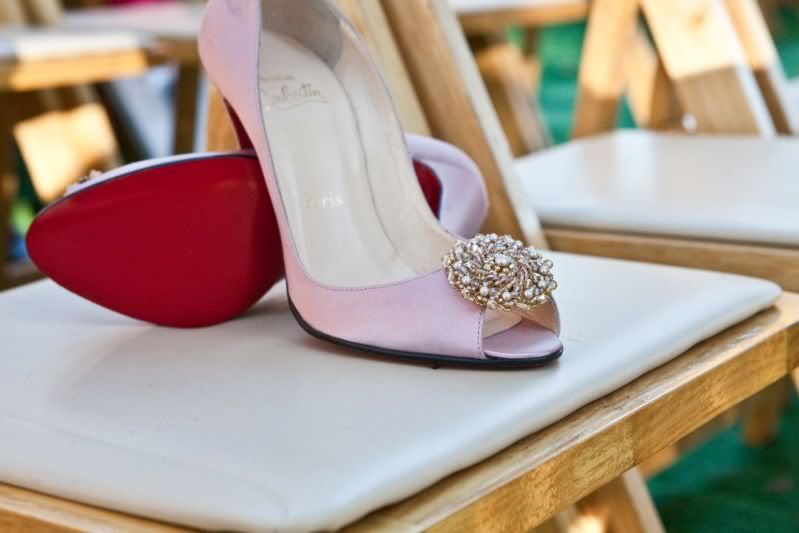
I had the shoe clips custom-made through an Etsy seller using the "alchemy" request. The clips were originally a different design but when she sent them, they were too small! There was some trouble with the redesign, shipping, and communication. But in the end, they turned out fine even if they weren't quite what I wanted and I almost had a heart attack thinking they wouldn't be done in time. And to top it off, I ended up losing one of the clips on the way to our reception site! :(

Photobucket

If you recall, my Louboutins were missing most of the wedding day. Thankfully, they were located before the ceremony. But they still weren't on my feet just yet...

Photobucket

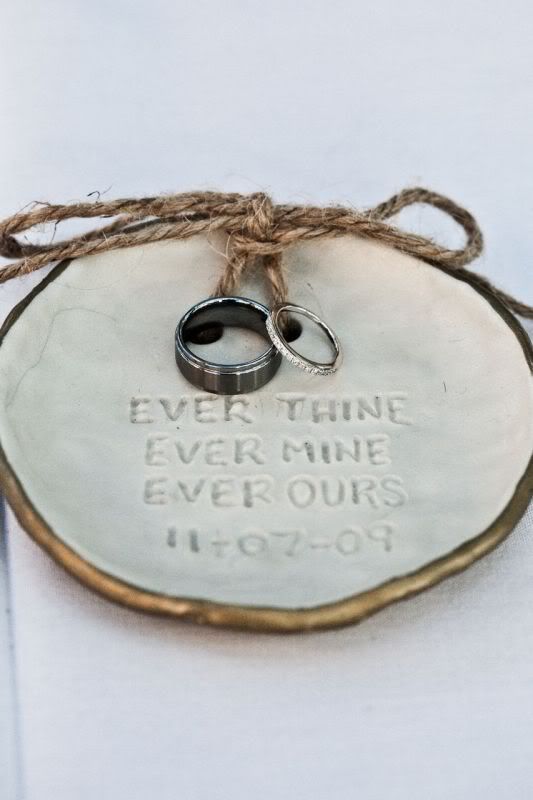
And since I'm showing off the bling, might as well show off the DIY ring dish I made for them to chill in on the way down the aisle.

Photobucket

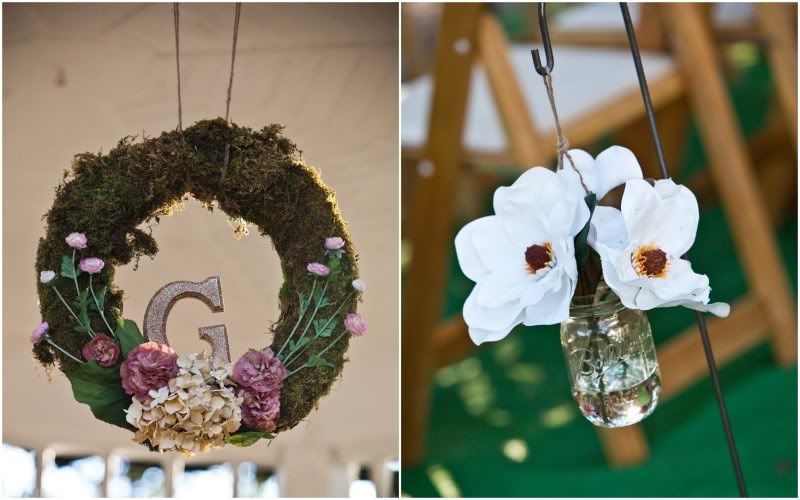
Remember my DIY wreath and my DIY mason jar/magnolia aisle liners with the "faux" water?

Photobucket

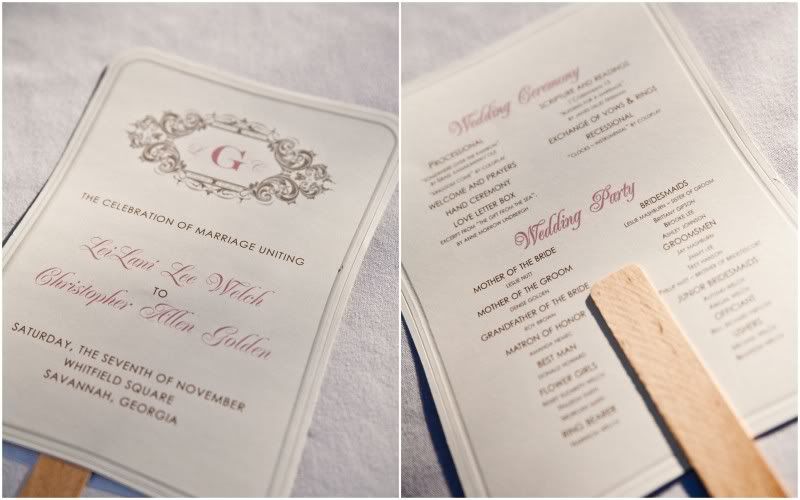
How about my semi-DIY double duty program fans?

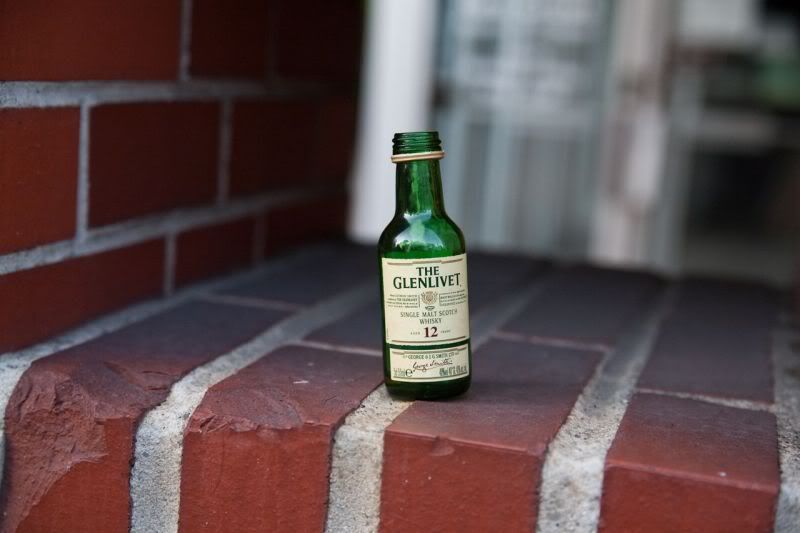
And the last little detail wasn't one I had planned on. Best man Don snuck in some mini-liquor bottles for some ceremony "tailgating" if you will.

Photobucket

Photobucket

Just a small indication of what's to come!

What are some little details you're going to include in your wedding? Will any of them be DIY creations?

Previously on Southern Sweethearts:

Next Up: We Get Hitched!

*All professional photos by Lindsi Jones Photography. Some images may have been slightly altered by moi.

Saturday, October 24, 2009

DIY Bridal Bouquet Part 3: Getting a Grip!

My bridal bouquet is officially complete! Remember way back when I hinted to the handle decoration and even gave a sneak peek to my "something blue"? Well, I've finally received my special adornments from my Ebay shopping excursion.

I planned to do two gold lockets to display photos of family members that will not be able to join Mr. Lab and I on our special day (although I know they'll be there in spirit). One locket would hold a photo of my grandmother who passed away a couple years ago and a photo of my dad who passed away when I was 14. The other locket would hold a photo of Mr. Lab's late father and his mother's twin sister who passed shortly after FSIL's wedding. But when the seller backed out of my purchase because he had misplaced the items since the close of the auction, I decided to go another route.

I was just doing a routine "locket brooch" search when I came across the Coro locket. These gorgeous lockets hold not 2, but 4 photos at once! And many of them are more fancy looking than regular brooch-style lockets. Isn't it just fabulous?


The locket on my bouquet handle.

Then there's my something blue (and something sparkly) on the front of the bouquet:


With these small additions, I am officially done with the bridal accessories! I'll let you know soon what my other accessories are (jewelry, clutch, and shoes, oh my!)!

Will your bouquet have any special or sentimental adornments?

Wednesday, September 30, 2009

DIY Bridal Bouquet Part 2: Changing My Mind

It's been awhile since I wrote about my bouquet-making adventures. In the first installment, I told you about my mock trial run. But a lot has happened since then. I've changed my mind about our wedding colors and opted to change my bouquet to reflect that. I sold the old, all-white peony bouquet and ordered some new, light pink peonies*! Aren't they fabulous?!? :D

I swear they're really pink. The flash seems to wash them out!

Along with the new bouquet, I switched up the bouquet handle. Instead of the simple champagne ribbon, I used a gorgeous (pictures don't show it) dusty pink ribbon. I also took some of your advice and beefed up the handle by using leftover stem parts!


To add some Southern charm, I added lace ribbon as an overlay. I love the look of the lace and pink ribbon together and it'll go perfectly with my dress.


And here's the nearly finished product!


I still have a little tweaking to do to it and some special handle additions, but it's about 90% done! Yay for another DIY project checked off the list! Best part? This bouquet cost about half the price of the other one, so I even saved money!

How are you making your bouquet handle unique or special?

*Flowers purchased at Afloral.com!

Friday, July 31, 2009

DIY Bridesmaids' Bouquets Part 1: The Transformers

I know I left you hanging with my DIY bridal bouquet mock trial. I abandoned that effort for awhile after changing my color scheme and deciding to go with a new dusty pink bouquet to match my shoes. I still haven't found any fake peonies in that color, but in the meantime I've been on the lookout for my bridesmaids' flowers.

I finally ran into some when I wasn't even looking. I was strolling around the mall looking for a place to get a quick and cheap hair trim when I saw that A.C. Moore was having a huge sale on their florals. As soon as I was finished being groomed, I high-tailed it back over to the store and started on a shopping frenzy.

After the dust settled, I had the following loot:


Enough for 3 bridesmaids' bouquets! After a lot of debate, I decided to go with separate flowers for each girl and then combine all the flowers into one bouquet for not me, but my matron of honor. I'm sticking with my beloved peonies but I wanted a way to have my MOH stand out, and a combo bouquet is just the ticket! My bouquet will still be the largest and most lush, but it's fun knowing my MOH will have a little mark of distinction.

I'm still searching for one more flower in the same pink for the last bouquet (not including the combo MOH bouquet). I really want the ranunculus, but I'm not seeing it anywhere! I may have to go online to find a light pink fake version, so it could be awhile before I complete this little endeavor.

Anyhoo, as soon as I got home, I started work on the task at hand. First up, the hydrangea bouquet. I won't go back through the tutorial since I used the same method in my previous post about DIY fake florals, but I will tell you that these suckers were a lot harder to work with than the peony.

They are a lot more delicate and deceivingly full. I had to constantly rework the shaping to make them round. Once again, I forgot to purchase wire clippers, so I had to cut the coating with scissors then work the wire back and forth until they snapped apart. My first round with the hydrangea looked weak to say the least:


But I kept at it! I finished "beefing" up the handle with a trick a reader gave me in my last post (thanks Andrea!). I did it by adding in the leftover stems while putting together the stems with the blooms. Genius.

After I was done, the bouquet performed a little trick of its own. My little work of art transformed from a regular bouquet into a stunning centerpiece!


While at A.C. Moore, I purchased a couple smooth mason jars and candle rings in our wedding colors to do a trial run our centerpieces. If you can remember, I originally planned to use a combination of mason jars, lanterns, and candelabras for the centerpieces. Well, after attending one of my bridesmaids' wedding last weekend and seeing her clever dual use of the BMs' bouquets as centerpieces, I decided to nix the candelabras and do the same! I'll still have some lanterns, but the mason jars will now be filled with the BMs' bouquets. All I have to do is add some kind of sea glass or something to the jars to keep the bouquets upright and add more detail. Suggestions are very welcome!

Because I'm having a cocktail hour in a separate parlor, my BMs will be able to sneak into the reception hall and place their bouquets into the mason jars before anyone else enters the room. At the end of the night, they can collect their bouquets to keep if they wish. Best part? This saves me money! Boo-yah!

I guess I should show you what I did with the other two flower choices? Well, here's my fave of the three bouquets, the daisies! They were by far the easiest of the bouquets to make. I was done in less than 10 minutes. FSIL already staked a claim on these:


And last but certainly not least are the roses. They even had little "thorns" on them that actually hurt a bit as I was plucking off the leaves. They made the handle really hard to wrap and I had to keep trimming some of them off.


And here's the whole lot together, "transforming" into centerpieces! I'll probably add tea candles around them just to spruce up the tables a bit more. Then all that will be left to do is adding the doggie table numbers (and completing the other 5 centerpieces)!


I can't take the all the credit on these bouquet/centerpieces. FSIL's husband's niece was in town with her mother and helped me snap apart the stems (after I prepped them, unbeknown to her). Who doesn't love a little child labor? :P


I love that she has her sippy cup on hand when the really tough ones come up!


Ah! Success!

So I bet you're wondering how much money all of this trouble actually saved me? Well, see for yourself! Keep in mind, these flowers won't die a few days after the wedding! ;)

Bridesmaids' Bouquets

Daisy Bouquet
10 stems
x $2.09 each
---------------
$20.90

Hydrangea Bouquet
5 stems
x $2.79 each
--------------
$13.95

Rose Bouquet
8 stems
x $1.39 each
--------------
$11.12

Chocolate Satin Ribbon
$4.39 for 1 1/2 yards

Pearl-headed Pins
$0.00 (left over from previous bouquet project)

Grand Total Including Tax
$53.89 OR $17.96 each

Centerpieces

Mason Jars:
$1 each x 3 = $3

Berry Candle Ring:
$2 each x 4 = $8

Grand Total Including Tax
$11.77 OR $3.92 each

Thursday, June 11, 2009

DIY Bridal Bouquet Part 1: The Mock Trial

I received my Fiori Belli silk peony stems earlier this week and finally had a chance to play around with them today!

My first impression of them was slight disappointment. I made a trip to Michael's to scope their floral section before deciding on fakes. The ones at Michael's felt more "velvety", like a real flower. But they didn't have cream-colored peonies (neither did Hobby Lobby) so I decided to go ahead with the online order. After awhile, the stems began to grow on me. They look real but are just missing that velvet feel. But I knew I had to sacrifice something when going with fake flowers. Now that I've done the trial, I'm in LOVE. Here's the result of my first trial with my bridal bouquet:


But let's take a moment to rewind and start from the beginning. The process of assembling the bouquet was ridiculously easy. Here's how it all went down!

First, I made a quick trip over to Michael's (with my 40% off any item coupon in hand) and purchased my supplies for less than $10:


Don't forget the most important supply!


The first step was removing the leaves. This was simple because they slide right out of the stem (upside of fake florals!). If you're using real flowers, you'll have to trim the leaves and thorns off (if applicable).


Next up was the assembling. I followed this video tutorial and wrapped the floral tape tightly around 3 stems at a time starting with the fullest blooms. Keep repeating the process by filling in the holes with more stems until you reach your desired bouquet size.


Before I knew it, the assembling portion was finished! I then moved on to covering the floral tape with my champagne-colored satin ribbon. I inserted the pins at an upward angle. Thankfully, this is a trial DIY, so no need to worry about the pins not being perfectly lined up...or the fact that I forgot to tuck under the raw edge of the ribbon...or how I didn't pay attention to wrapping the ribbon evenly...or, well, I think you get the picture. Lessons learned. Btw, 1 yard of ribbon is probably all you'll need. I purchased 3 yards not knowing how much it would take but ended up almost double-wrapping my handle with just 1 yard.


I could have paid more attention to keeping the head of the bouquet more "round & balanced". Again, lesson learned on that one. Plus, I had to keep the stems long because I didn't think ahead about how I was going to deal with the thick wire inside of them (downfall of fake florals!). FMIL's beau is bringing some wire clippers over tomorrow for me! :)

Being proud of my creation, I took Myspace-like photos of me & my bouquet in the mirror. I think it's just the right size and combo of cupped and fully blossomed stems!


The only thing I'm longing for now is the scent of fresh flowers. But FMIL suggested just buying a peony-scented perfume to spray on them the day of the wedding so I wouldn't be missing out completely.


All in all, I'm very pleased with the DIY fake flower bouquet and am pretty much convinced that I will do the same for my bridesmaids' bouquets. Now that the trial is complete, I can focus on perfecting the bouquet by fixing my mistakes, finding a way to beef up the handle size, and adding details to the handle. So stay tuned! And since you've stayed with me up to this point, here's a sneak peek at my inspiration for the handle:

Monday, May 4, 2009

Faux Florals: My Flower Details

It's finals week for me which means a week full of some major procrastination. Luckily, I exempted 2 finals and only have 1 left. The test isn't until Friday, so I've been getting lots of wedding planning done in the meantime. I wish studying for a test was as much fun as planning for a wedding! Ah, in a perfect world...

Anyways, I was out scouting the floral section at my local Michael's and Hobby Lobby when I made a very big decision. I am going to use as few real flowers in my wedding decor as possible. I know, I know! Some of you are thinking I've gone completely bonkers. But trust me, I've thought long and hard about this. I'm just not a flower person. Plain and simple. Because of this, I see no reason to spend tons of money on something I'm not into (and neither is Mr. Lab).


My decision was aided by the fact that silk flowers have come a LONG way in recent years. I was able to check out some of the new "true touch" peonies I wrote about earlier. I honestly wouldn't be able to tell the difference between them and real peonies unless I was either told or smelled them (and I hope I'm not inviting any creepers to my wedding who would walk up and sniff my flowers!). I would have bought some right then and there had they been the right cream color. Instead, I ordered the flowers for my bouquet from Fiori Belli. My bouquet only cost $80 shipped and will last forever! Because the blooms are so big, I probably won't need all the flowers to make the bouquet (I'm ordering 1 set of 6 stems each of cupped and full blown blossoms). I will possibly use any extra stems to make a hairpiece or in other decor. Now I have to start thinking about the ribbon for the handle of the bouquet!

As for the other floral details of the wedding, I have a few ideas in mind. I'm using either Wedding Decor Online or Psalm117 on Etsy for my flower girl pomanders (that they'll get to keep!). I am making my BM's bouquets but haven't decided on the flower I want to use. And for the ceremony, I may go the same route as Mrs. Cherry Pie and line my aisle with mason jars filled with flowers. This may be one of the few places I use real flowers. If I do, I'll reuse them in the reception space. I don't know whether I'll use sheperd's hooks or just ribbon to hang the jars yet. Which one do you prefer?


Mrs. Cherry Pie's mason jars & dahlias

Photo by Piknik Studios


Using ribbon will be cheaper and easier.
Source

Is anyone else using fake flowers for the majority of their floral decor?

Monday, April 13, 2009

Peony Passion

When I first started planning for our wedding, flowers were the least of my concerns. I'm not a big flower person (they die quick, so what's the point?) but I do want to have bouquets for all the girls in my wedding. Because I'm not a big flower person, it took lots of research and time to find a flower I would like to carry in my bouquet down the aisle. I finally decided on an all white (technically cream) bouquet of peonies. The more I looked at pictures of them, the more I fell in love.

*SWOON.* If flowers were celebrities, the peony would be Brad Pitt. MANY women want them in their weddings. But like Miss Cowboy Boot, I found out that the peony is not in season in November. I was devastated.

I briefly entertained the idea of similar flowers, but I'm not giving up on my new favorite flower that easily! You fight for true love, right? So now I'm considering making my own bouquet using fake peonies. I've found a few sites that offer the "true touch" faux flowers but I'm a little nervous about actually trying this. I would love to get some feedback and suggestions on making your own bouquet and even helpful websites (I will be digging through Bee archives for DIY bouquets!). I still have no clue what I'm doing for my bridesmaid's bouquets but I do know I want theirs to be deep red flowers that compliment the peony. Help on that will be much appreciated as well!

Maybe when it's all said and done I will have my dream bouquet AND save tons of money in the process! I found a site that provides incredibly realistic fake peonies. They sell them as bunches of cupped or full blown blossoms which I think adds to the realism. Here's an example:

Source

At $36 for a set of six stems, this choice seems a bit high since I'll probably have to buy 3 or 4 sets to make a full, lush bouquet. And that doesn't include tax and shipping! Although I'm no florist, I have a feeling that trying to get fresh peonies shipped from some remote place far away for a November wedding would be a tad bit pricier. At least my fake flowers won't die and they'll make a great centerpiece for our home after the wedding!

So what do you think? Should I go through with the DIY fake flower bouquet of peonies? I'm waiting on your feedback before placing my order!